You might have downloaded some high quality, free photos. You plan to use this stock photo on your website, maybe even for a banner or an ad. But you’re stuck. You don’t know how to add music to a photo, so that’s where I come in. This is a step by step guide with 5 different methods for adding music to a photo without copyright issues.
In this article, I will talk about “How To Add Music To A Photo”. Let’s start.
Contents
Adding music to a photo is a great way to add more emotion, interest and feeling to your images.
To do this, you’re going to use a free program called Audacity. It’s available for Windows, Mac and Linux computers.
Once you’ve downloaded the program, open it up and follow these steps:
1. Import your image into Audacity by clicking on File > Import > Audio. Then select the photo from your computer’s hard drive and click Open.
2. Once your image has been imported into Audacity, look at the toolbar on the left side of the screen for an icon that looks like this:
3. Click this icon to bring up a menu where you can choose which part of your audio track you want to use as “background music” for your photo. Find something that fits well with the mood of your image and then click OK when you’ve decided what works best!
How To Add Music To Pictures
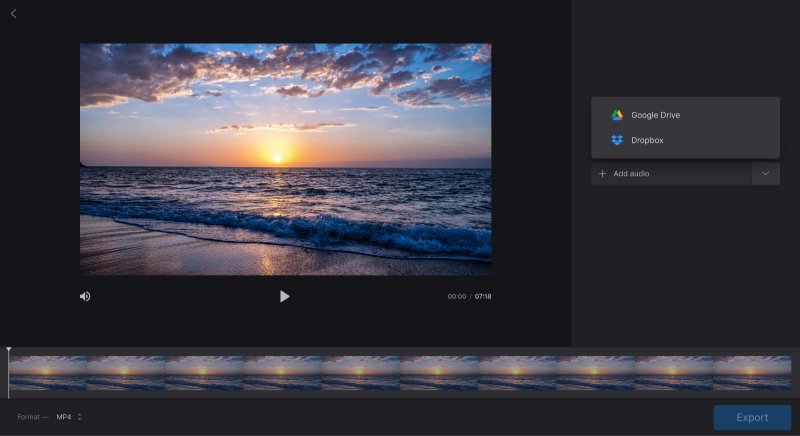
Add Audio To Picture Using Beecut
Adding music to a photo is easy, and you don’t need any special software. All you need is a picture and a song to match.
The Beecut app is one of the best apps for adding audio to a picture. It’s free, easy to use and lets you choose from a wide variety of songs.
Here’s how to add music to your photos with Beecut:
1. Open the Beecut app on your phone, tablet or computer.
2. Select the image you want to add audio to by tapping on it or dragging it into the center of the screen. Once your image is selected, tap “Select photo.” If you didn’t select an image in step 1, tap “Take photo” in this step instead.
Adding audio to a photo is easy with Beecut.
1. Open Beecut and select the picture you want to add music to.
2. Click on the Music icon on the top left corner of the screen.
3. Select any song from your iTunes library or search for it online and download it for free!
4. Once you’ve added audio, you can share your creation with friends on Facebook, Twitter, YouTube and more!
Adding Music To A Picture By Using Use Lightmv
Adding Music To A Picture By Using Use Lightmv
Adding music to a photo is a very simple and easy task. First you need to select a song and then upload it in your device’s memory card or phone. Now you need to transfer it to your computer using USB cable. Now come back to the site from where you downloaded Lightmv and click on ‘Import’.
The second step is to import the picture in which you want to add music. After importing, you can directly see the picture which has been imported by default. If you want some other picture, then click on ‘Add Photo’ option at the bottom of the page and select another picture from your gallery or camera roll. You can also see some suggestions for pictures on the website itself after typing something on search bar.
Now click on ‘Music’, which will open up another window where you can select your favorite song from different categories like Pop, Rock, Hip-Hop etc based on your choice of songs. Finally click ‘Create Movie’ button and wait till it completes its process of creating movie file with music added in it.

Adding Audio Files To Pictures By Using Apowershow
You can add audio files to pictures by using Apowershow. This software is a very effective tool for adding audio files to pictures. The best thing about this software is that it allows you to add music to any images and then burn them on CDs.
You can use this software in various ways. You can use it as a screen saver, as photo editor or as photo viewer. The main reason why people use it is because of its ability to edit the images and add audio files to them.
Adding Audio Files To Pictures By Using Apowershow
The following steps will guide you through the process of adding audio files to pictures by using Apowershow:
1) Download and install the application on your system by visiting their website at www.apowersoft.com/apowershow-download-trial/
2) Open the program and click on “File” from the menu bar located at the top left corner of your screen. Select “Open file” from there; you will be prompted with a window where you need to navigate to your desired image file that contains an audio file that needs to be added onto another image; make sure that both images are on your computer before proceeding with this step!
How To Add Music To Photo Using Photo & Video Slideshows
Adding music to a photo is a great way to spice up your photos. There are many ways to add music to photos, and here I will show you how to do it with Photo & Video Slideshows.
Step 1: Download Photo & Video Slideshow from the Play Store. It’s free, so go ahead and do that now if you haven’t already done so.
Step 2: Open up the app and select the photo or video from your gallery that you want to add music to. The app supports both formats, so feel free to use whichever one you like best.
Step 3: Tap on the ‘Music’ button at the top of the screen and then select a song from your library or choose one from Spotify (requires an account). The app will automatically suggest some songs based on what’s already playing in the background, but those suggestions aren’t always great so feel free to ignore them if they don’t suit your tastes.
Step 4: Once you’ve selected a song, tap on ‘Play’ at the bottom-right corner of your screen and wait for it to load up before continuing with step 5 below.
Adobe Rush: Pic Music App
Adobe Rush: Pic Music App
Adobe Rush is a free music app that lets you create music videos from your photos. It’s very easy to use and only takes a few minutes to create a video.
How to Use Adobe Rush: Pic Music App
To start using Adobe Rush, open the app and select your photo. You can choose from your camera roll or take a new photo. If you’re taking a photo, be sure it’s in focus before you snap it. Then, tap on “Create Movie.”
Once you’ve selected your photo, you’ll see the options for making your video. Tap on “Choose A Song” to browse through all of the available music tracks in the app’s library. You can also use one of your own songs if you like by tapping on “Your Music.” Once you’ve found the song you want to use, tap on it and then tap on “Start Recording.”
You’ll now see yourself as an animated character dancing along with the music track. You can move around freely within this space and record yourself dancing however you like — just don’t forget about those moves! When you’re ready to stop recording, tap on “Stop Recording” at the bottom of your screen.

Learn How To Add Music To A Picture With Imovie
Learn How To Add Music To A Picture With Imovie
If you’re like me, you have a bunch of pictures on your computer that you’d like to make into a slideshow to share with family and friends. But what’s the best way to add music?
The easiest way is to use iMovie on your Mac. It’s free, it’s easy to use, and it even lets you sync up the audio and video so that they start and end together.
Here’s how:
1) Open iMovie and click “New Project.” Then click “Import”. This will let you import photos from your hard drive or camera.
2) When the photos have been imported, drag them into order on the timeline at the bottom of the screen. You can also rearrange them by dragging them from one position to another on the timeline. Or just drag them off the screen entirely if they’re not needed anymore (but don’t delete them!).
3) When all your photos are in place, double-click one of them to open up its properties window where you can add text titles or change its duration (how long it appears on screen).
How To Add Audio To A Picture Using Go Pro With Splice
How to Add Audio To A Picture Using Go Pro With Splice
Splice is a cloud-based music creation platform that lets you add audio to photos. The service combines audio and video editing tools, making it easy for users to create music videos from their photos. You can also use Splice to add music to photos.
To do this, open the photo on your computer and click “Add Audio.” Then select the song you want to use and click “Create.”
The video will automatically be uploaded and synced with your photo. You can also edit it if you want by adjusting the length of time it plays or changing its volume level.
You can also use Splice as a simple music player so that when people visit your page they’ll hear whatever song you’ve chosen.
Go pro is a popular video editing platform and app for creating videos with music. It’s been used by many professional filmmakers, like the Kardashians and even Taylor Swift, to create high-quality content.
However, it’s not just for pros. Anyone can use go pro to spice up their videos with music.
In this guide, we’ll show you how to add audio to a picture using go pro with splice.
Put Music To Pictures With Kinemaster
Put Music To Pictures With Kinemaster
Kinemaster is a free video editor for Windows. It allows you to easily create animated videos using only your built-in webcam, images, and music. You can also add text and effects to your videos.
With Kinemaster, you can export your video as an MP4 file that you can then upload to YouTube or share with friends on social media sites like Facebook and Instagram.
There are several ways to add music to your video in Kinemaster:
Import audio from your computer – If you have music stored on your computer, you can import it into Kinemaster by clicking the “File” menu at the top of the screen and selecting “Import Audio” from the drop-down menu. Click “Browse” and select the song you wish to use (you must have an mp3 file).
Kinemaster is an open source video editing software that lets you add music to photos and videos. It has many features and tools that let you add music to your pictures easily.
Here is a quick guide on how to add music to pictures with Kinemaster:
1. Download and install Kinemaster on your computer.
2. Open the application and click File then New Project.
3. Select the image or video you want to add music to, then click Edit.
4. Click Music at the bottom right corner of the screen and select Add Audio Track from Library tab.
5. Click Browse button next to it, then select an audio file from your library or click Open button on top left corner of the window to browse for it manually in your computer (make sure it’s MP3 format).
FAQs for How To Add Music To A Photo
Now that you understand “How To Add Music To A Photo”, let’s move on to the FAQ section.
How Can I Add Music On A Picture?
How Can I Add Music On A Picture?
Music is an important part of our lives. We listen to it every day to make our lives better, happier and more enjoyable. When it comes to photos, music can also be very useful. If you’ve ever wanted to add music to a photo, here’s how to do it!
Step 1: Choose Your Song
First things first – you need to choose a song that you want to add to your photo. If possible, try and find a song that has lyrics that match up with what’s going on in the picture. For example, if there are two people kissing in one photo then you should try and find a song with lyrics about love or romance because this will make sense when added onto the photo.
Step 2: Open Paint or Another Program
Open up Paint or another program on your computer that allows you to add text onto images (such as Photoshop). Then choose where you want the text placed on the image and type out some words related to what’s happening in the picture (such as “I love you” if there are two people kissing).
Which App Can I Use To Add Music To A Picture?
Adding music to a photo is a great way for you to express yourself. This can be done in a number of ways. One way is through the use of an app.
There are many apps available for adding music to a picture. Some of these apps work well while others do not. The following are some of the best apps that you should consider using:
1) iMovie
IMovie is a free application that comes with the Mac computers by Apple. It allows users to add different effects and filters to their photos before they share them with friends and family members on social media networks such as Facebook, Twitter and Instagram.
2) Photofy
Photofy is another application that allows users to add music to their photos before sharing them on social media networks like Facebook, Instagram, Flickr and Twitter. The app works well but it can be quite slow at times when it comes to loading images into the program while also offering limited options when it comes to editing pictures with this program.
How Can I Add Music To A Picture On My Iphone?
Adding music to a photo can be a great way to turn it into a video montage, but you’ll need to know how to do so on your iPhone or iPad. It’s not too complicated, but there are some steps you’ll need to take.
How Can I Add Music To A Picture On My Iphone?
First, take a picture or select one from your camera roll. You can also add music to videos if you like. Once you have the image selected, tap on the share button at the bottom of your screen and choose “Add Music.” This will open up iPhoto and allow you to choose which song you want to add. That’s all there is to it!
How Can I Add Music To A Picture On My Iphone?
I have a lot of pictures on my iPhone. I would like to add some music to one of them. The picture is a picture of me and my friends. How can I add music to it?
You can use the Music app that comes with your iPhone to add music to your photos. Just follow these steps:
Open the Music app. It looks like a circle with musical notes inside.
Tap a song that you want to use for your photo, or tap Artists if you want to browse all the songs in your library. The artist’s name will appear at the top of your screen if there are more than one available album from that artist. Use the search bar if there aren’t enough albums from an artist for you to browse through easily.
Tap More > Edit > Add Music To This Photo. Your photo should now be playing as you scroll through your library looking for other songs or artists!
How Can I Add Background Music To A Picture Online?
You can add music to a photo in a number of ways. The most obvious is to simply use the built-in editing tools that come with your photo-editing software, but there are also several websites on the internet which allow you to add background music to your photos.
The most popular of these is MyMusicCloud.com, but there are others such as Background Music for Instagram and Music for Photos.
All these sites give you the option of uploading a picture from your computer or taking a new snap directly from your web browser. You then have several options when it comes to adding music – some sites allow you to choose from a range of tracks while others have pre-selected albums that are suitable for adding background music to photos. You can also opt for royalty free music which means that you don’t need permission from the artist or creator before using their work on your website or blog (but please check the terms and conditions before doing so).
Once you’ve decided on which song you want, simply click play and watch as it plays over your chosen image!
How Do You Put A Song Behind A Picture On Instagram?
How Do You Put A Song Behind A Picture On Instagram?
Instagram is a social media app that allows users to share photos and videos. When you’re posting a photo on Instagram, you have the option to add music to it.
How Do You Add Music To Your Instagram Photo?
You can add music to your Instagram photos by following these steps:
Open your profile and scroll down until you find the “Add Music” feature icon. This icon looks like two musical notes.
Tap on the “Add Music” icon to open up the music library that is integrated within the app. Here, you will see songs from multiple sources such as Apple Music or Spotify. Choose the song that you want to add to your picture.
Once you’ve chosen your song, tap on it and then tap on “Done”. The audio will now play in the background while you continue using other features of Instagram like tagging friends or adding hashtags.
Conclusion for How To Add Music To A Photo
Now that you know how to add music to a photo, it is important to note that there are some drawbacks to this technique. Due to the nature of adding music to your photo, even if you do make the song editable, the audio cannot be removed once added to the image.
Thank you for reading, and I hope you get the point of “How To Add Music To A Photo”. If not, please contact me or leave a comment below. I would be pleased to help in any way I can.