Embroidering on hats isn’t quite the same as stitching on a flat shirt or tote bag. If you’ve ever tried to hoop a cap or digitize a logo for one, you already know: hats come with curves, seams, and structure that make digitizing a whole different ball game.
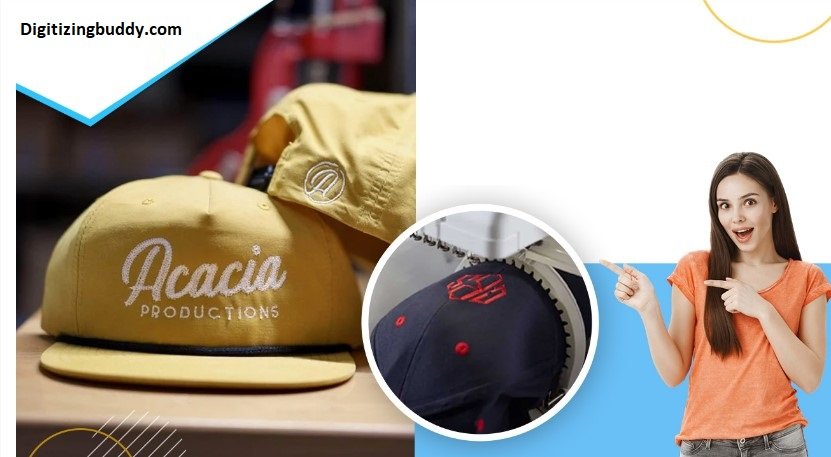
Want perfect cap files without trial and error? Digitizing Buddy offers professional hat embroidery digitizing that’s tested, optimized, and ready to stitch on structured or unstructured caps. It’s the fastest way to get clean, curve-friendly designs with zero headaches—especially for small businesses, sports teams, or custom merch sellers.
Let’s break down the key techniques, considerations, and tools that’ll take your designs from flat to flawlessly curved.
Why Hats Are Tricky for Embroidery
Unlike flat fabrics, caps are curved, rigid, and sometimes awkwardly shaped. That means your design has to be digitized differently to prevent:
- Misaligned stitches
- Warping or distortion on the curve
- Gaps between letters
- Needle breaks on center seams
- Unreadable small text
Caps also require specialized hooping systems, like cap frames or rotating hoops, and stitch best when digitized with the curve and seam structure in mind.
Digitizing for Hats vs. Flat Surfaces: What’s the Difference?
Digitizing for hats isn’t just about resizing a logo—it’s about rethinking how the stitches will perform on a three-dimensional surface.
Here’s how hat digitizing differs:
| Feature | Flat Digitizing | Hat Digitizing |
| Surface | Stable, flat | Curved, structured |
| Start Point | Flexible | Usually from center out |
| Stitch Type Usage | More flexibility | Controlled density & direction |
| Text Size | Small fonts okay | Minimum 5–6 mm recommended |
| Underlay Stitch | Optional | Essential for structure |
| Hooping | Standard | Requires cap hoop/frame |
If you digitize a cap design like a t-shirt design, expect problems. Let’s look at how to do it right.
Techniques for Digitizing Embroidery for Hats
Here are the top digitizing techniques professionals use to get designs looking sharp on curved caps:
1. Always Start from the Center Out
Embroidery machines often distort designs slightly as they stitch. On hats, that distortion becomes more obvious due to the curve and center seam.
Solution: Always digitize to stitch from the center out. This ensures symmetrical designs align perfectly over the seam and reduces shifting.
2. Use Proper Underlay Stitching
Underlay stitches provide the foundation for your top stitches and help stabilize the fabric—especially critical on structured hats.
- Edge Run Underlay: Helps define crisp edges
- Zig-Zag Underlay: Adds volume for satin stitches
- Tatami Underlay: For large filled areas
Skipping underlay leads to wobbly outlines, puckering, and poor registration.
3. Mind Your Density
Hat fabrics (especially structured or thick ones) don’t need the same stitch density as flat garments.
Use a slightly lower density (0.40–0.45 mm) to prevent thread buildup and breakage.
High-density designs on hats can cause the needle to deflect or even break.
4. Avoid Tiny Text and Thin Details
Small text might look great on a t-shirt—but it won’t translate well to a curved cap.
- Minimum recommended text height for caps: 6 mm
- Use bold fonts with open spacing
- Convert text to satin stitches, not fill stitches
If you must include smaller details, consider breaking them into a separate patch or flat panel instead of stitching directly on the cap.
5. Watch for Seam Placement
The dreaded center seam on most baseball caps is a digitizer’s worst enemy.
Start your design right on or above the seam and stitch symmetrically outward.
Increase stitch length slightly over the seam to reduce deflection.
Use reinforced underlay where the needle crosses the seam.
Digitizers often split outlines into two mirrored parts to reduce the impact of the seam.
6. Keep the Design Simple & Bold
Hats have limited real estate. Focus on strong, bold designs that can be read from a distance.
- Use thick outlines
- Avoid gradients or high-detail areas
- Stick to 2–4 colors max
- Don’t overcrowd with text
Best Design Sizes for Common Hat Placements
| Hat Area | Recommended Size |
| Front Panel (structured cap) | 2.25″ H × 4.5″ W |
| Low-profile cap front | 2″ H × 4″ W |
| Side panel | 1.5″ H × 2.5″ W |
| Back (above closure) | 0.5″–1″ H × 2.5″ W |
| Visor/Bill | 1″ H × 3″ W |
Always test-stitch before full production, especially if you’re using new materials like suede, mesh, or foam-front trucker hats.
Tools & Software Used for Hat Digitizing
Professional digitizers use high-end software to optimize hat files, including:
- Wilcom – Industry standard, great for cap profiles
- Hatch – User-friendly and cap-compatible
- Embird – Good for both hobby and pro use
- Pulse – High-end commercial use
These programs allow you to adjust stitch angles, simulate curves, assign underlays, and control stitch sequence.
Who Needs Hat Digitizing Services?
- Custom merch brands (think streetwear, sportswear, esports)
- Businesses branding caps for uniforms or promotions
- T-shirt & cap shops expanding into embroidery
- Hobbyists stitching on caps at home
- Embroidery businesses offering hat-specific products
If you’re planning to stitch on any curved surface, hat-specific digitizing is a must—and best handled by a pro.
Why Digitizing Buddy Is Ideal for Hat Designs
Digitizing Buddy isn’t just any digitizing service—they specialize in curve-optimized embroidery for hats, caps, visors, and headwear.
Here’s what you get:
- Center-out digitizing for curved surfaces
- Perfectly spaced satin stitches that handle seams well
- Free edits and stitch-proofing before final delivery
- Fast turnaround—often under 24 hours
- Multiple formats supported (PES, DST, EXP, and more)
Whether you need a logo stitched over a seam or a monogram for a flex-fit cap, Digitizing Buddy delivers files that actually stitch beautifully on hats.
Pro Tips for Better Hat Embroidery Results
- Use structured caps for better hooping and support
- Always test-stitch your cap designs on scrap or sample hats
- Choose high-quality stabilizers (like cutaway backing or cap backing)
- Thread tension matters—keep it tight enough for structured caps
- Ask your digitizer to optimize for foam if you’re doing 3D puff embroidery
Final Thoughts: Stitch Smarter on Curved Surfaces
Digitizing for hats isn’t just resizing your t-shirt design—it’s about adjusting for structure, seam, curve, and movement. When done right, you get bold, clean, and durable designs that pop on headwear.
So if you’re stitching for brands, sports teams, merch drops, or just your own style—make sure your embroidery files are built for the curve.